Showing posts with label diy. Show all posts

My Wedding Vows

Monday, August 6, 2018
Wedding Mount Annan Botanical Gardens CeremonyWax Paper Decoration Wedding Ceremony
Wedding Mount Annan Botanical Gardens Ceremony
Wax Paper Decoration Wedding Ceremony
Wedding Mount Annan Botanical Gardens Ceremony

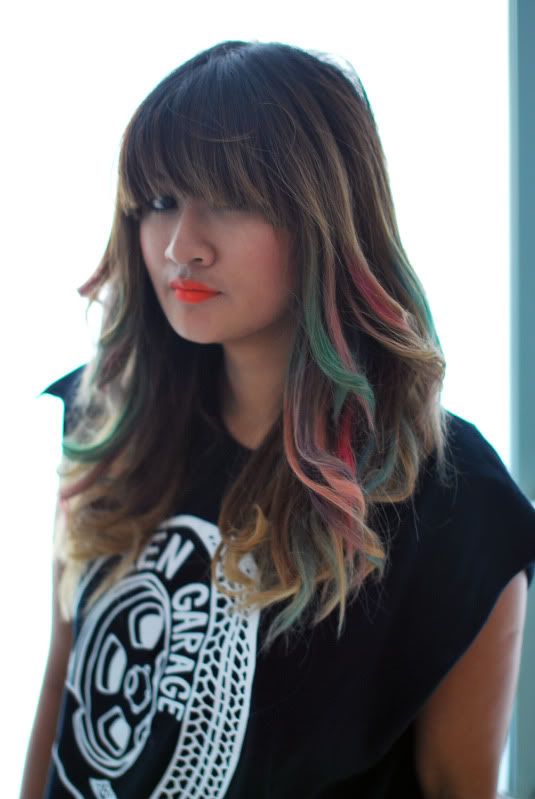
Wedding Dress: Skirt by Jurgita Bridal, Top was handmade, Viel from a friend.
Ceremony Arch Backdrop: Handmade. Followed Tutorial from Style Me Pretty

I started my vows at least three months before the wedding, but the challenge to get them right dawned on me every day. Everyday, I was adding, removing, chopping, thinning or giving more depth, constantly tweaking.
So I did what I did best, and left it alone for some time and went back to it a few days just before the wedding. The pressure to pull the wedding together was already effecting me but the pressure cleared my mind. 
In the end though, all I did was pour my nerdy heart out:

Hai, You and I know we could've crossed paths at least three years earlier. We could've been a couple for much longer. 
But we didn't and we weren't. We met at a time where we were finally ready for each other. 
...... I like to believe that when fate allowed us to meet, it was because it was meant to be. We met so we could guide one another to become even better versions of ourselves right here, right now. 

And we've had three years full of patience, understanding, fun, compassion, adventures, kindness, stubbornness, and most of all, love. 

So Hai, I vow to continue our journey with gusto, like Korra trying to achieve the Avatar state. 
I vow to be as strong as I can be for you, just like a level 20 D&D character. 
I vow, to walk by your side and support you like Pikachu supports Ash.
I vow, to bake you Anzac Cookies more than once a year. 
I vow, to not tell a soul your secret recipe for HFC. 
I vow, to love you more then I love my own iPod. 
I vow to kick anyone's ass if they say your car is anything other then a Jeep. 
And I vow that we will grow together to achieve everything we want in life. We will be the Super Sayan, a Pokemon's final evolution, the Luke Skywalker from Episode 6. 
And we would do it with flair just like One Punch Man's serious moves. 

Thank you for letting me be me and loving me for who I am. I vow to continue to do the same for you. My heart swells with love at the thought of our future together. 

So in saying that Hai, I promise that you will always have my Spider Staff....


I had asked eleven members across the The Battle Crusaders (our D&D group) and our friends to participate with my vows to Hai. In a Lord of The Rings fashion, our friends shouted out things like "And my Fireball, And my Javelin, And my Charm!" and I was really relieved Hai finally got what was going on as his face went from confusion to laughter. I asked him later on that day and he admitted his first thoughts were "Who are these dickheads trying to ruin my wedding?"

How to make Playdough (play-doh): A DIY Recipe

Tuesday, June 4, 2013
How to make Playdough play-doh DIY Recipe Food Colouring

 A DIY Recipe: How to make Play dough (play-doh)

Play Dough is a classic toy that children (and adults!) just love to play with. I made my batch of play dough from this website for my *adults only* best friend's hens night a few weeks ago. But this was so easy to make at home and it's such a cheaper and more safer option than the store bought kind for children as well.

Ingredients (for each colour batch; makes a standard zip lock bag size):
2 cups flour
1 cup salt
2 tablespoons vegetable oil
2 cups warm water
1 tablespoon Cream of Tartar (this is optional, but it does improve play dough elasticity)
A range of food colouring
Scented oil (optional)

Step 1 (cook): Mix all the ingredients together in a bowl, transfer to a pot and stir over low heat. The dough is sloppy at first, but soon it starts to look like mashed potato/smashed peas after a few minutes. 
When the dough starts to pull away from the sides and clump in the middle and becomes thick and dense in texture, remove from heat. If dough still looks sticky, just keep cooking until it starts to resemble play dough. Don't worry, it will happen! (I freaked out for a bit thinking I ruined the play dough when my first batch was so sticky and gooey for such a long time). Allow the dough to cool in pot before handling it.

Step 2 (Knead and add colouring): When the dough is cool to touch, transfer it to a clean surface (I used my chopping board). You can then divide the dough for smaller batches if required. Then knead the dough until its smooth and free of lumps. 
Once satisfied, mould the dough into a a volcano shape, add a divot with your thumb in the centre. Add 3-4 drops of food colouring into the divot. Don't over-drop, it's better to add food colouring as you go if you find the colour is not strong enough. Then fold and knead the dough so that the colour is kneaded through. Gloves are optional, if you don't want to stain your fingers and nails. 

Note: I made up some of my colours by mixing two colours together in a small bowl before transferring to the dough (I couldn't find some of the colours I wanted). For purple: mix blue and pink. For Orange: mix red and yellow. If you want brown (for some reason): mix purple and yellow together.

Step 3 (Storage and Maintenance): It's best to store your Play Dough in an air tight container/zip lock bag. If it begins to dry out, you can knead a little bit of water through the dough. If its too soggy (due to high humidity in the weather), you can try to reheat if over the stove to dry out the excess water. 

The Play dough is safe for children and adults and it's a salty edible toy (I wouldn't recommend trying it though...). Also note, do not let your dogs near it as they can get sick from the excess of sodium if they eat it. You can even bake it in the oven to make ornaments and statues. 
I personally used my play-dough for my best friend's hens night, for something called the 'Pecker Game' where the guests had to mould a pecker into what we thought the groom's pecker was to look like. Happy Play-Doughing!

A cherished memory: Drawing chalk art for my birthday

Thursday, May 24, 2012

Wearing: Sportsgirl metallic dress; Sportsgirl boots

On a sunny afternoon in Prestons, me and my friend John sat on the road overlooking a farm. We pulled out fresh Jumbo chalks and started to draw. John etched out "Happy Bday Nat(star)" - my nickname from John and I marked out balloons and flowers and shadows and ribbons - whatever shapes my childhood memories could recall. 

When cars drove past I stood on my drawing guarding our work from their wheels as they inched past. I wasn't going to let them drive over it. Holding chalks and sitting out in the sunlight, it made me forget all my troubles of the day. I only cared about the pretty colours and the shapes, and perfecting the drawing. It was nice start to the evening - John treated me to a birthday dinner because he couldn't make it to my party. I will definitely cherish this memory.

The cupcakes were a gift from my cousin, who baked these herself. I salvaged these from the birthday party, still intact and pretty. I almost didn't want to eat them because they were perfectly iced and perfectly sprinkled.

xx Natalie


Follow Me on Pinterest

Chalking my Balayage Hair, a DIY tutorial with Pastel Chalks

Sunday, April 22, 2012
Balayage Hair: Before chalking
Munovo Soft Pastel Chalks
Twisting my hair as I go
Applying the pastel chalk in a downwards motion
Finished style, curled with a hot iron and some hairspray to hold it

What I used for my balayage hair: Munovo Soft Pastel Chalks Pack of 24; curling iron; light hairspray. (Water is only needed if your hair is dark, or you want to make colour brighter)

Chalking my Balayage hair: I was looking for a quick and temporary hair colour change for the upcoming Wish fashion showing I was attending. Chalked hair was a fantastic alternative to using my usual fudge - because it washes out straight away. 
  • To start, you will need to purchase some soft pastel chalks (do not get mixed up with oil pastels - too sticky! or normal chalk - won't release pigment easily). Soft pastel chalks releases good pigment and washes away with water.
  • If you have light hair such as mine, you can apply the pastel chalk straight to separate strands of hair.  DO NOT NEED TO ADD WATER. Twist your hair as you go, because the friction releases more pigments. 
  • Apply in a downwards motion, not in an up and down motion as so you do not get your hair tangled and ratty. It also helps to move in the natural direction of your hair.
  • Mix two colours on the one strand of hair for more fun, it can give a tie-dyed effect!
  • If you want a more intense and brighter colour to your hair, you can add some water as you apply (please note this can cause staining and can stay in your hair for longer than one wash because the powder is now more like a dye).
  • If your hair is dark, you will need to add water anyways for the colour to show
  • After chalking, you can use a hot curling iron to curl your hair or just to 'set' the colours into your hair. Finish off with hairspray if needed.
  • Please note the chalking powder may come off during the night - try to wear dark colours or same colours as hair to avoid the stains showing.
  • Be careful of wet weather! Rain will make the chalk run, and you definitely do not want that happening. Use gloves and towels to avoid getting the chalk everywhere as you apply.
I found a great beauty tutorial here on The Beauty Department. This article comes with some very helpful tips! I used 5 colours - pastel pinks, dark purples, greens and blues. I applied to the front layers of my hair. But you can use your imagination and use as many colours as you like.
After I shampooed, I used my Goldwell conditioning treatment to treat my ends, I won't lie, the chalking really dried out my hair. So I won't do it often, but I love it still.
Happy Chalking!

xx Natalie

Related Posts Plugin for WordPress, Blogger...